How to Simplify Circuit Board Assembly for Beginners?
In the world of electronics, mastering circuit board assembly is essential for aspiring engineers and hobbyists alike. Renowned expert and author, Dr. Emily Carr, once stated, “Efficient circuit board assembly is the backbone of innovative electronics.” Her words emphasize the importance of simplifying this process for beginners.
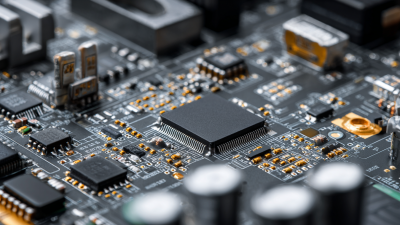
Circuit board assembly can be daunting at first. Complex designs and intricate components often create confusion. Many newcomers struggle with soldering or component placement. Simplifying this process can alleviate anxiety and enhance learning. Visualization tools and clear instructions can guide beginners through each step.
However, it’s crucial to acknowledge challenges. Mistakes are part of the learning journey. A misplaced component or a cold solder joint can lead to frustration. Reflecting on these errors can spark growth. By embracing the learning curve, beginners can gradually transform their skills in circuit board assembly, paving the way for more advanced projects.

Understanding the Basics of Circuit Board Assembly for Beginners
Understanding circuit board assembly can seem daunting for beginners. The process involves various steps that require attention to detail. Start with a simple design and manageable components. This approach helps in grasping the fundamental concepts without feeling overwhelmed.
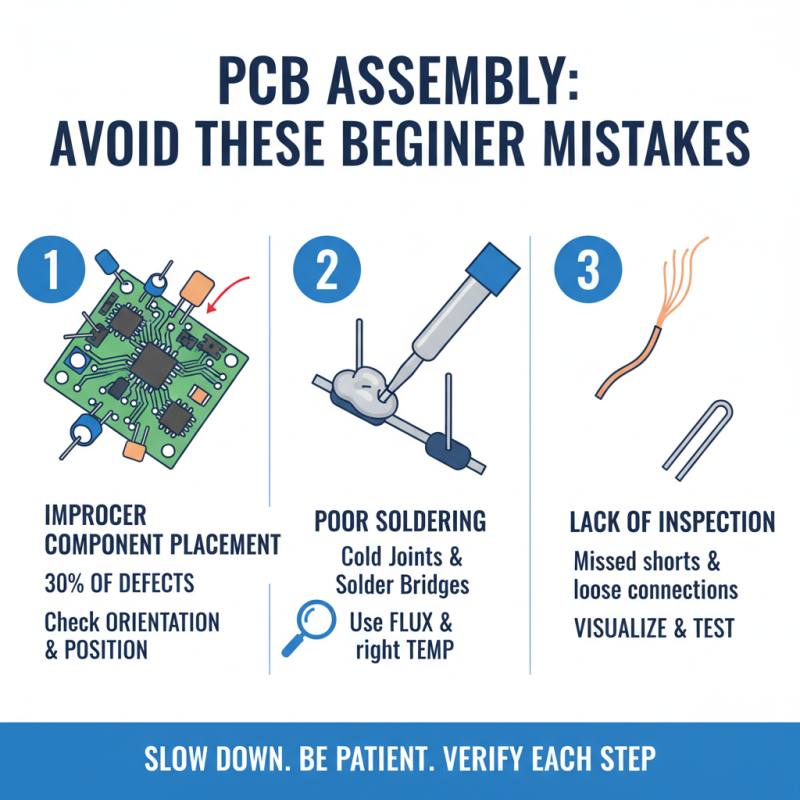
As you layout your components, take your time. Mistakes are common in this phase. Forgetting to check the orientation of a component can lead to issues later. Use a magnifying glass for small parts. It helps to avoid frustration. Soldering can be tricky; practice on scrap boards to build confidence.
Power your board only after a thorough inspection. Double-checking connections saves time and potential rework. Every step in assembly is crucial. Beginners should not rush. Embrace the learning process, even if it feels slow. Each assembly teaches valuable lessons, making future projects easier.
How to Simplify Circuit Board Assembly for Beginners?
| Component |
Type |
Description |
Basic Pricing ($) |
| Resistor |
Passive |
Limits the flow of electric current. |
0.10 |
| Capacitor |
Passive |
Stores electrical energy temporarily. |
0.15 |
| Diode |
Active |
Allows current to flow in one direction only. |
0.20 |
| Transistor |
Active |
Used to amplify or switch electronic signals. |
0.30 |
| Microcontroller |
Active |
A compact integrated circuit designed to govern a specific operation. |
5.00 |
Essential Tools and Materials for Simplifying Assembly Tasks
When starting with circuit board assembly, having the right tools and materials is crucial. Essential items include soldering irons, clarity workspace, and quality solder. According to industry data, 85% of assembly errors are due to inadequate tools. Selecting high-quality tools can minimize mistakes and improve the assembly process.
A clean workspace will enhance focus. Use organizers for tools and components. This helps beginners avoid losing small parts. It’s estimated that beginners spend 30% more time searching for misplaced tools. Investing in labeled containers can save time and frustration.
Tip: Always check your soldering iron’s temperature. Irregular heat can lead to component damage. Also, practice soldering on scrap boards. This builds confidence. Remember, assembly requires patience and precision. Analyze mistakes to improve your techniques. Mistakes are part of the learning curve. Embrace them.
Step-by-Step Guide to Designing Your First Circuit Board
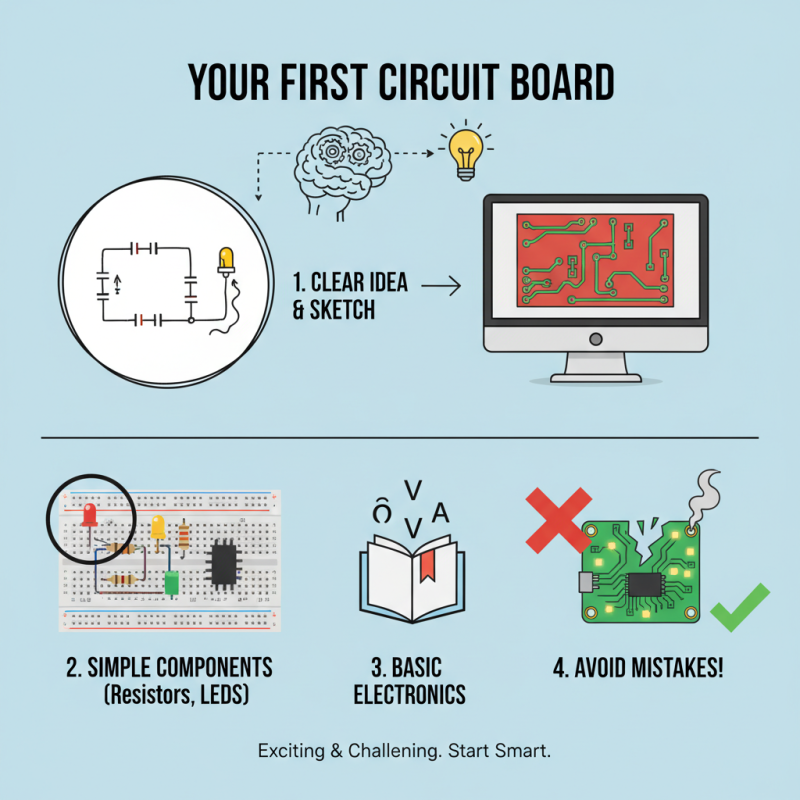
Designing your first circuit board can be both exciting and challenging. Start with a clear idea. Sketch out your design on paper. Use simple components like resistors and LEDs. It’s helpful to understand basic electronics. This can avoid many mistakes later on.
Once your design is ready, move to PCB design software. There are free options available. They are user-friendly for beginners. Create the schematic first. Connect the components in the software. Be patient; errors are common. You might realize that some connections don’t work as planned. That’s part of learning.
After the schematic, layout the board. Arrange components logically. Minimize space, but don’t crowd them. Remember, trace lengths matter. Too long can cause issues. Once satisfied, send it for fabrication. It’s nerve-wracking to wait for the first prototype. Mistakes may occur, and that's okay. Each iteration brings improvement. Keep tweaking, and you’ll see progress.
Tips for Efficient Soldering and Component Placement Techniques
Soldering is a critical skill in circuit board assembly. For beginners, mastering this technique can be daunting. Reports indicate that nearly 30% of novice assemblers struggle with soldering quality. An easy way to improve is by using a soldering iron with adjustable temperature settings. This allows for precise control over the heating process, which is essential for different components.
Effective component placement can greatly enhance workflow. An organized workspace makes a huge difference. Arrange components by type and size. Use small containers to keep them from mixing. This reduces the chance of errors and saves time searching for parts. Data shows that a clutter-free workspace can improve efficiency by up to 20%.
However, mistakes will happen. Maybe a joint is cold, or the wrong component is placed. The key is to review and learn from these errors. Documenting each soldering session can identify recurring mistakes. Regular practice will build confidence and skill. Ultimately, refinement in these techniques leads to smoother assembly processes.
Component Placement and Soldering Efficiency for Beginners